
'%3e%3cpath%20d='m19.6%2066.5%2019.7-11%20.3-1-.3-.5h-1l-3.3-.2-11.2-.3L14%2053l-9.5-.5-2.4-.5L0%2049l.2-1.5%202-1.3%202.9.2%206.3.5%209.5.6%206.9.4L38%2049.1h1.6l.2-.7-.5-.4-.4-.4L29%2041l-10.6-7-5.6-4.1-3-2-1.5-2-.6-4.2%202.7-3%203.7.3.9.2%203.7%202.9%208%206.1L37%2036l1.5%201.2.6-.4.1-.3-.7-1.1L33%2025l-6-10.4-2.7-4.3-.7-2.6c-.3-1-.4-2-.4-3l3-4.2L28%200l4.2.6L33.8%202l2.6%206%204.1%209.3L47%2029.9l2%203.8%201%203.4.3%201h.7v-.5l.5-7.2%201-8.7%201-11.2.3-3.2%201.6-3.8%203-2L61%202.6l2%202.9-.3%201.8-1.1%207.7L59%2027.1l-1.5%208.2h.9l1-1.1%204.1-5.4%206.9-8.6%203-3.5L77%2013l2.3-1.8h4.3l3.1%204.7-1.4%204.9-4.4%205.6-3.7%204.7-5.3%207.1-3.2%205.7.3.4h.7l12-2.6%206.4-1.1%207.6-1.3%203.5%201.6.4%201.6-1.4%203.4-8.2%202-9.6%202-14.3%203.3-.2.1.2.3%206.4.6%202.8.2h6.8l12.6%201%203.3%202%201.9%202.7-.3%202-5.1%202.6-6.8-1.6-16-3.8-5.4-1.3h-.8v.4l4.6%204.5%208.3%207.5L89%2080.1l.5%202.4-1.3%202-1.4-.2-9.2-7-3.6-3-8-6.8h-.5v.7l1.8%202.7%209.8%2014.7.5%204.5-.7%201.4-2.6%201-2.7-.6-5.8-8-6-9-4.7-8.2-.5.4-2.9%2030.2-1.3%201.5-3%201.2-2.5-2-1.4-3%201.4-6.2%201.6-8%201.3-6.4%201.2-7.9.7-2.6v-.2H49L43%2072l-9%2012.3-7.2%207.6-1.7.7-3-1.5.3-2.8L24%2086l10-12.8%206-7.9%204-4.6-.1-.5h-.3L17.2%2077.4l-4.7.6-2-2%20.2-3%201-1%208-5.5Z'/%3e%3c/svg%3e)
Probes run checks from the networks you want to observe. A probe is registered to one project and authenticates with its own credentials.
Requirements
The probe agent supports Linux on amd64 and arm64. A typical installation needs:
- A host with
systemdand root access. curlorwgetto download the agent.- Outbound HTTPS access to the Netstamp controller.
- Network access from the host to every target the probe should check.
No inbound connection from the controller to the probe is required.
Register and install a probe
- Select the project where the probe should belong.
- Open Probes and choose New probe.
- Give the probe a recognizable name and optional location.
- Copy the generated installation command.
- Run it as root on the target Linux host.
The generated service installation uses the controller URL, probe ID, and a one-time secret:
sudo netstamp-agent service install \
  --url 'https://netstamp.example.com' \
  --probe-id '<probe UUID>' \
  --probe-secret '<one-time secret>'
Treat the command as a credential. Do not paste it into tickets, chat logs, shell history shared between users, or configuration management output.
Confirm connectivity
After installation, the probe page should show a recent heartbeat. The controller records agent version, addresses, public IP information, and supported IP families when available.
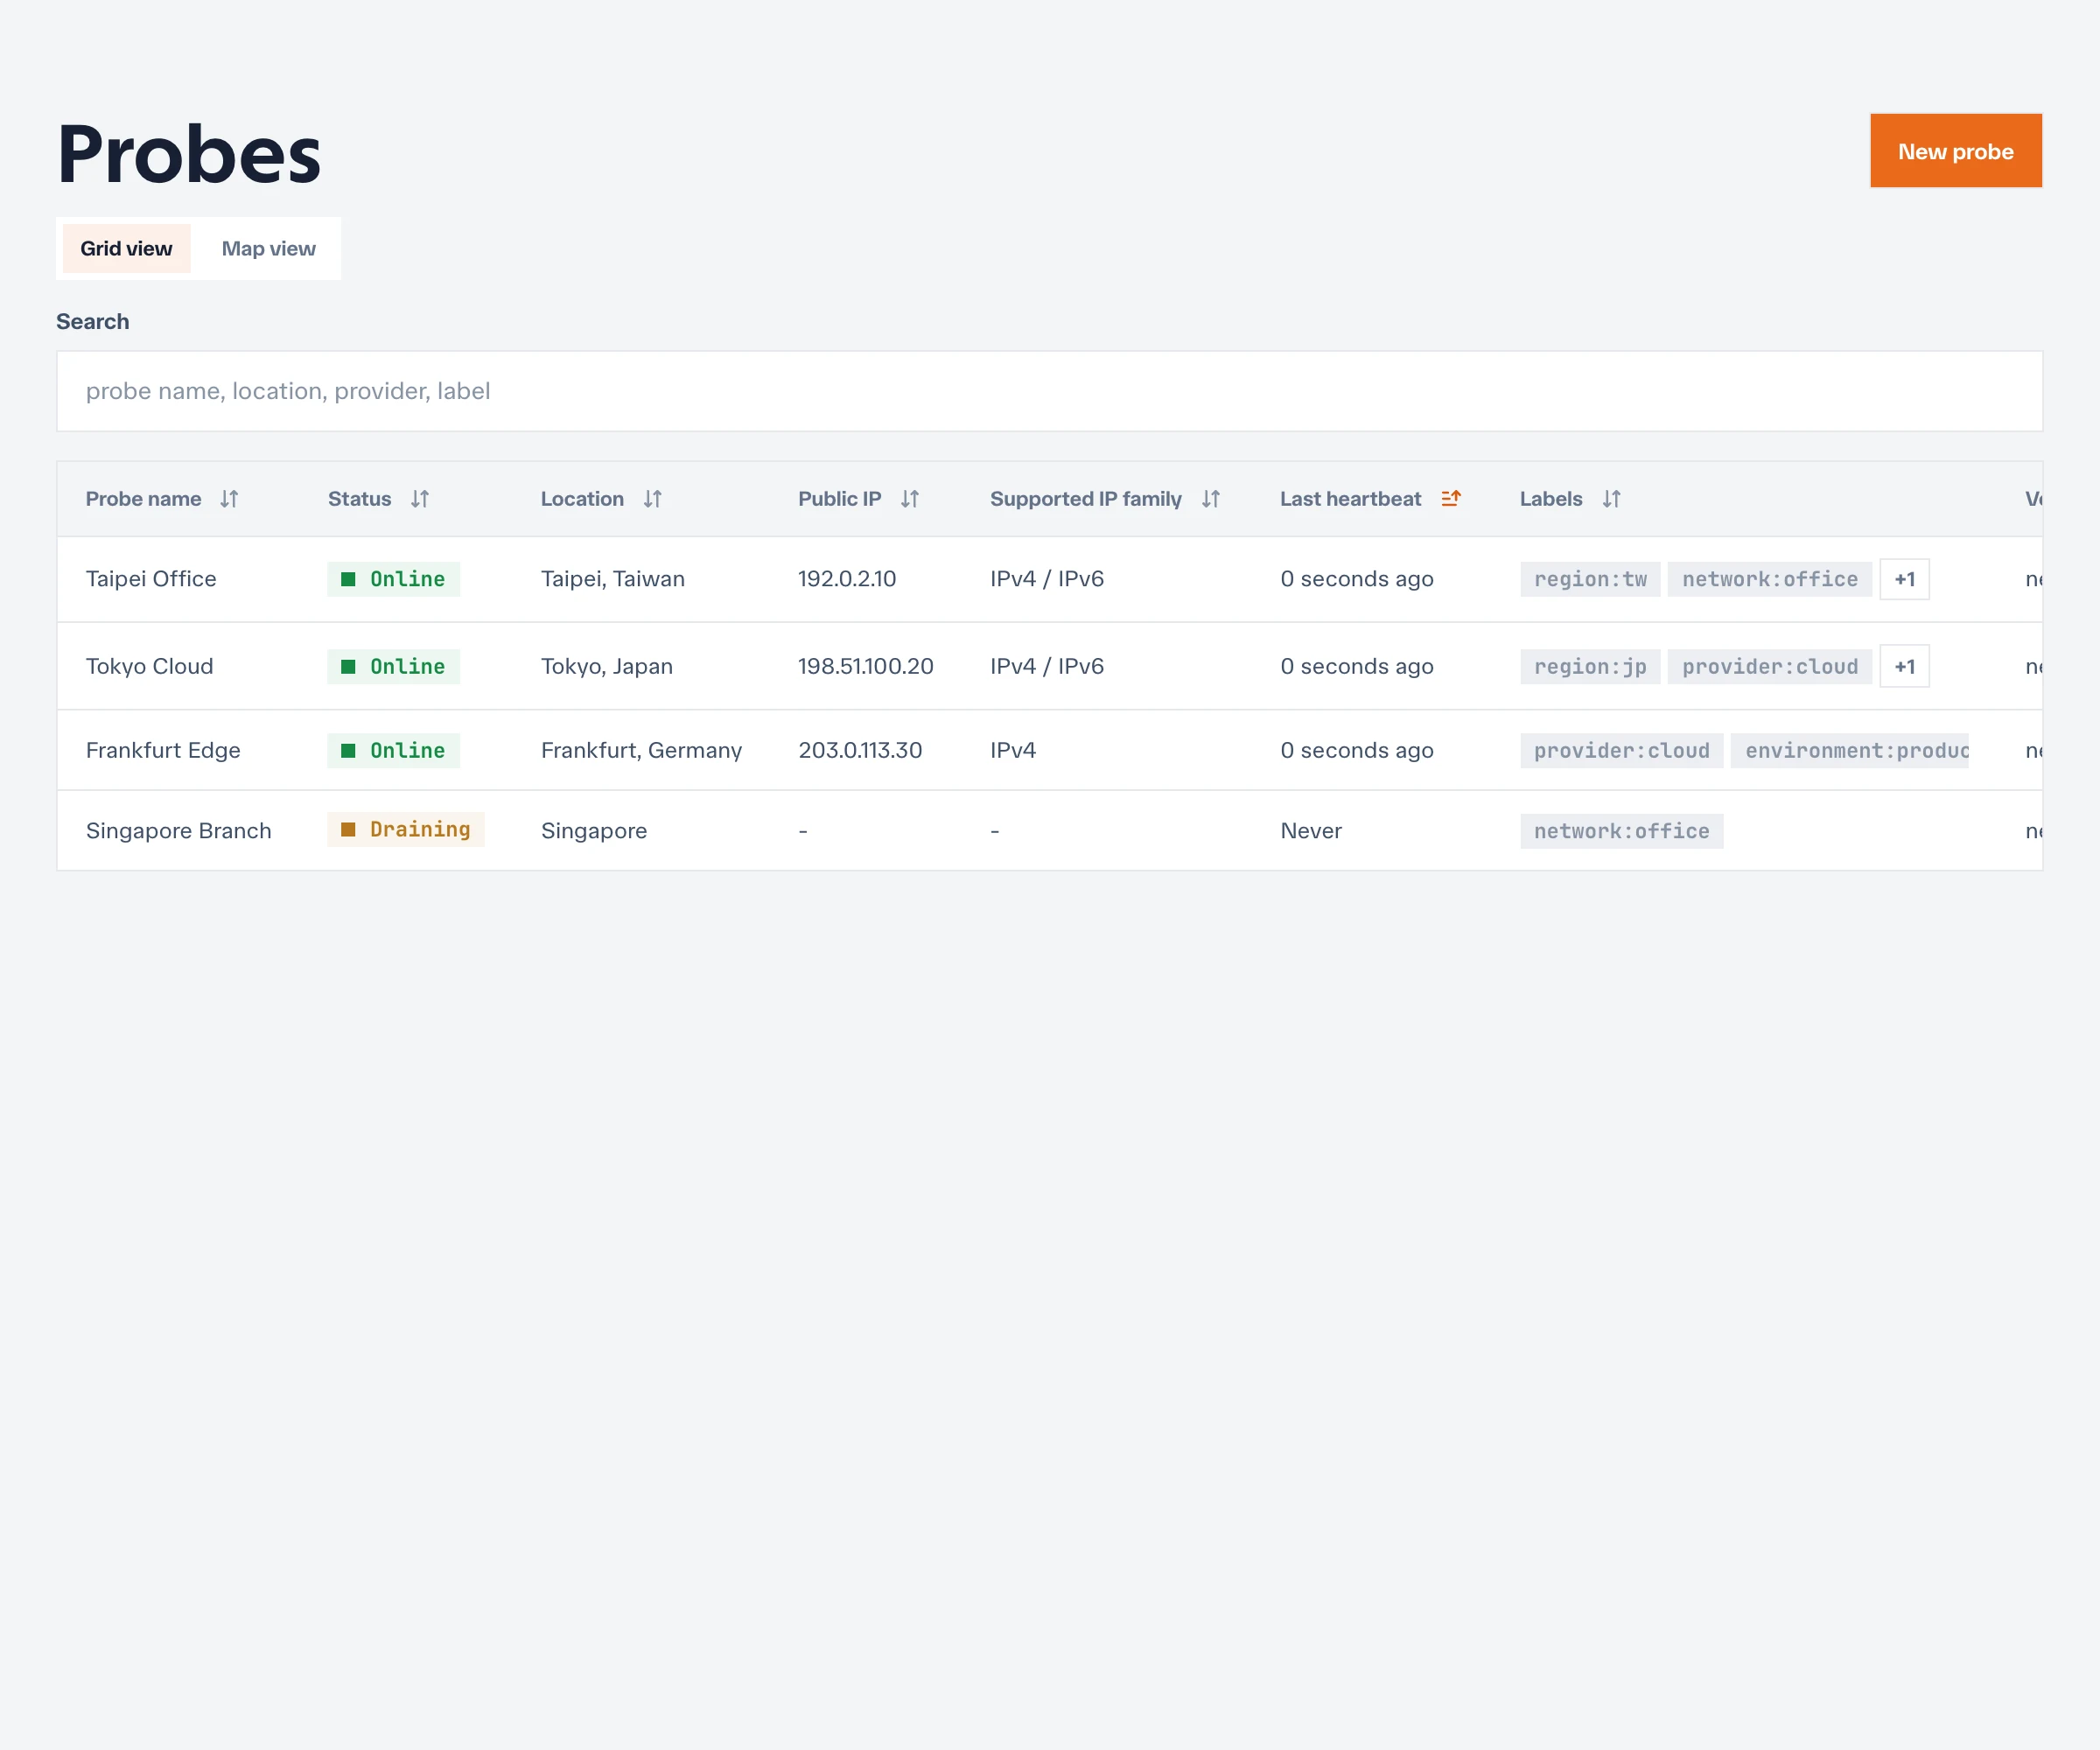
If the probe remains offline, verify the service and logs on the host:
sudo systemctl status netstamp-agent
sudo journalctl -u netstamp-agent -n 100 --no-pager
See Probe agent operations for file locations, upgrades, and recovery steps.
Name, location, and labels
Use names that remain meaningful in result comparisons, such as taipei-office or aws-tokyo-1. Location is descriptive metadata.
Labels control assignments. Add labels such as region=tw, network=office, or provider=aws, then use the same keys in check selectors. Read Labels and assignments before changing labels on a production probe.
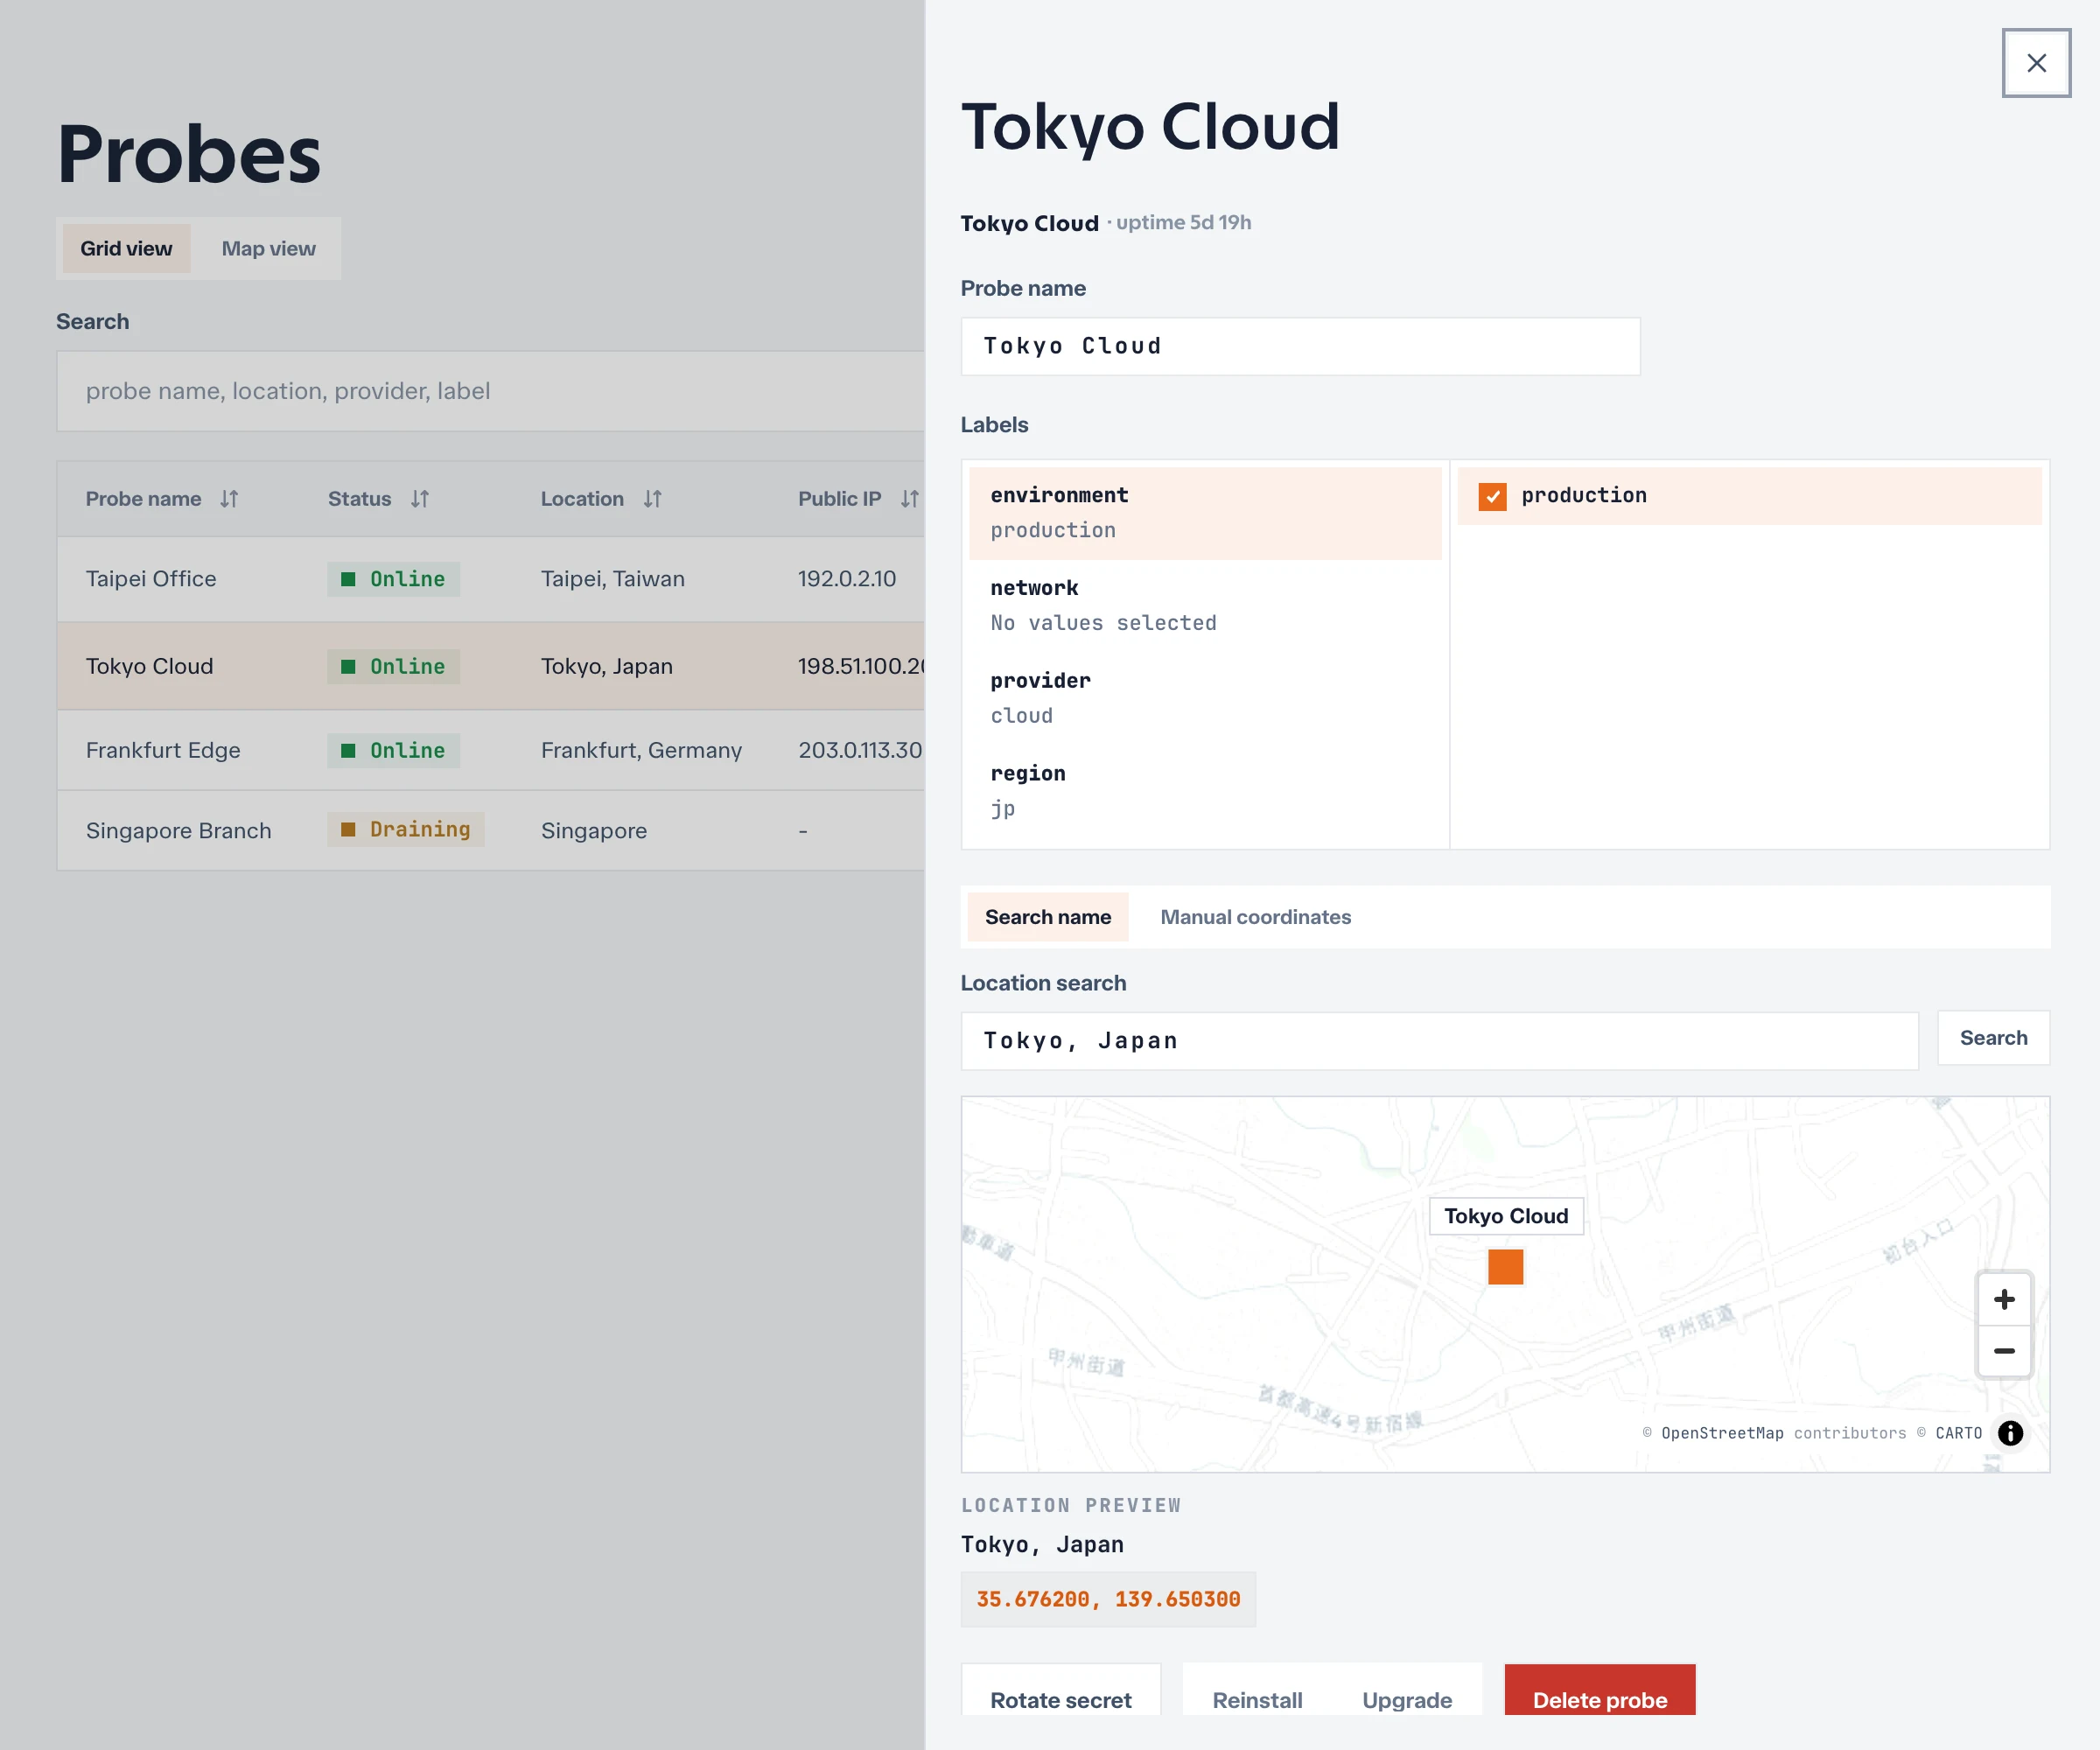
Enabled and online are different
- Enabled controls whether Netstamp assigns checks to the probe.
- Online indicates whether the controller has received a recent heartbeat.
Disable a probe before planned maintenance to stop new work from being assigned. An offline but enabled probe may still affect monitoring expectations until it returns or is disabled.
Rotate credentials
Rotate a probe secret if it may have been exposed or when transferring host ownership. Update the service environment on the host with the new secret and restart the agent.
Only delete a probe after confirming that its historical identity and assignments are no longer needed. For temporary outages or maintenance, disable it instead.
Next, add labels and selectors or create a check.